Showing posts with label card organizer. Show all posts

Monday, May 31, 2010

June Challenges

Seasonal: Father's day
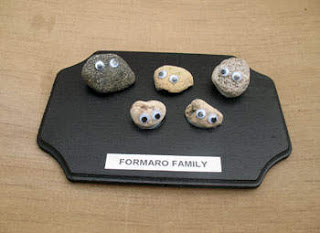
Dad rocks plaque (a fun craft kids can help with. You don't have to actually make a plaque, but you could paint rocks/make a rock family or rock dad paper weight and have a card that says Dad Rocks)
Oragami shirt card
Retro labels to go on a gift he actually wants

Self:
Make it, wear it challenge at Sew Mama Sew
If you make an item of clothing this month and submit a photo of it to Sew Mama Sew's photo pool (follow link above for more details), you have the chance to win a new sewing machine. I've been wanting to make some skirts since my church attire is severely lacking, so here are a few skirt ideas:
5 minute skirt
Bohemian skirt
Jeans refashioned to skirt
Tiered (girls' or womens') skirt

Kids:
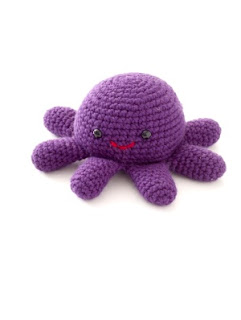
Crocheted Amigurumi Critters
The first is not actually a tutorial, but it has pics of the other creatures you can make. Get the free patterns (and a lot of other free crochet patterns) from Lion Brand after signing up for their site.
Recipe recommendation: Flour Tortillas
Per Lisa Wheat Flour Tortillas
Per Celia A better (white) flour tortilla
(The second is an improvement on my old flour tortilla recipe that I used for 8 years. I combined mine with another recipe and the texture is much better than my original. I imagine you can use wheat flour, though I haven't tried it.)

*tip to making tortillas: if your dough is too elastic and keeps shrinking back in, cover it with a cloth and let it rest 5 min. Come back and try again.*

Tuesday, February 23, 2010

Maren's Card Organizer

Yay! I'm finally finished with my card organizer. Well, almost. I will need to buy or make envelopes at some point. I went with the binder route although I liked Celia's idea of the accordian file.


In the binder I included a birthday calander and list of addresses. I have all of our family birthdays listed on my wall calander so I know when they are coming up but I like having them all written down in one place so when I sit down to make cards they are right in front of me. I also included some notes on what sizes to cut the cards and paper to go on top of cards.

It took me awhile to get into the grove since I haven't really made a lot of cards before, but once I got started and found the best size I was able to really go to town and I think I made over 30 cards - enough for the whole year! I followed Celia's advice on card sizes (folding an 8.5x11 in half and then cutting it in half).

I am soooo glad I did this project because I am normally pretty good at getting birthday cards out, or at least I try to be pretty good at it, but I have hated spending the $2-$5 on each card. In the last year or so I decided I wanted to make cards because I figured it would save a lot of money. Over the past year I bought an acrylic stamp set at Costco, a couple of those scrapbooking paper pads, cardstock, and my favorite - I found double sided cardstock with matching border trims at Sam's Club, all with the intent to start making my own cards. It probably sounds a little overboard, but over the next year I will have made up that in cost by making my own cards plus I will have the stamps and paper to make cards for the next several years! And it was a lot of fun!


For some cards I just used double sided cardstock, but I think my favorites are the plain colored cardstock with scrapbook paper. I found that one piece of scrapbook paper can be used for several cards.


Here is the original link.

XO
Maren

Monday, February 15, 2010

Celia's Card Organizer

I'm not 100% finished, but I have the majority done. Some of Matt's are going to be store bought "funny" cards, and I haven't bought those yet.

Here's what I think will work best for me and my organizational personality.

An accordion file folder labeled "blank" and Jan-Dec.


In the front I have one sheet of paper (printed up in word without anything fancy) that has all of the birthdays and events.

In the blank slot I have thank you cards and unclaimed birthday cards (in envelopes) so I can easily grab and send them if something arises.

In each month slot I have a card inside an unsealed, addressed, and soon to be stamped envelope for anyone with a birthday I chose to send a card to (mainly brothers and sisters and parents with a few in-laws and nephews on Matt's side...my side there are just too many people to send a card for every birthday!).

Then on google calendar I typed in each birthday and set it to send me an email the week before the birthday so I remember to drop it in the mail so they get it on time.

Hopefully I can get my Christmas cards made early in the year too and add it to this. I'm just all papered out to do it right now.

About 2 years ago I went through a paper crafting phase and bought quite a few double sided cardstock sheets on sale. Shortly after I bought them I switched to fabric and haven't done anything paper since!! I tried to keep them all simple with similar elements so I didn't have to think too much. But because I was using up what I had, they don't all match exactly. Here are a few of the cards I made. (inside the bird one it says "happy bird-day")

Friday, February 12, 2010

Birthday Calander Template

Has anyone started on their card organizer yet? I just sat down to start it and I found this great birthday calander template if anyone is interested. I love it. I also typed up all of my addresses in Excel and realized I have a lot of old addresses! I still have to get a binder. Any thoughts on size for those of you who may have started already. Can't wait to sit down and try my hand at making a few handmade cards and envelopes. (I googled evelope tutorial and found tons). I'm actually really excited about this project. It is going to stretch me a little bit since I am both unorganized and un-paper-crafty.