Showing posts with label maren. Show all posts

Thursday, February 17, 2011

Aprons on the Brain

I haven't been in a sewing mood for a little bit, but I have done a little bit of sewing and crafting in the past few months that I haven't yet included on this blog. For Christmas I decided I wanted to make some aprons for gifts. I am in dire need of a new apron myself so I thought I would try to find a good pattern and use it to make a gift and later (when I feel up to it) I can make one for myself. In fact, I am remembering now that I even made an apron (reversible half apron) for my new sister-in-law Lexi for her bridal shower back in October.


For Christmas, my siblings and I rotate who we give gifts to and this year I had my brother Joel and sister in law Abby and their two little boys. Knowing how much my own kids love baking with me, I thought it would be fun to give them a Mom and Me Cookbook and a little cooking set  as well as some pint sized aprons for the boys (they are 3 and 1 1/2). Well I ordered all the cooking gear and before I sat down to pull out my fabric bin to see if I had any decent boy fabric, I checked out Abby's sewing blog and low and behold I sat face to face with a picture of her little guy in a cute but manly apron. What?! (oh and by the way it is a free pattern/tutorial and it is awesome!) So I crossed that off my list, and got to work on some aprons for her and my brother.

For Abby's apron I used this free ruffle apron tutorial. I just used what I had and I used lots of pink and some Amy Butler because I know she is a fan of both. And there is some yummy Heather Bailey fabric in there too. I really liked how it turned out and I know she really liked it too.


I am not really into sewing for men. Both my husband and my brother are very manly men and I much prefer sewing frills. The very first pattern I bought way back when I first started sewing and I was a new mommy was a simple apron pattern. I made several of them. My husband  wanted me to make one for him but he insisted it had to be made of some real fabric - nothing too flimsy, so he helped me pick out some real tough duck cloth/canvas. The apron I made for him 5 years ago has held up very well and he doesn't hesitate to wear it when he is grilling. So I figured I had better go the same route with my brother. I remember the first apron my dad ever had. It was a blue and white check apron with the words "#1 Cook" on it. I have fond memories of my dad working in the kitchen wearing that apron. I thought it would be fun to find some blue and white check fabric and put those same words on Joel's apron and cross my fingers that he would remember my dad's apron as well. So his apron is pretty utilitarian, but I hope that he will get some wear out of it. I know he can be a mean cook when he wants to be - especially when it comes to meat.


I also decided to make an apron for another one of my sister-in-laws, Maren, (I have a lot of sister-in-laws) and this is where the pattern comes in. I searched etsy for some cute patterns and I only found about 50 that I wanted. There are some seriously cute aprons on etsy and I really really loved seeing all the vintage inspired ones. After some serious deliberation I bought the Pretty Ditty Apron. I loved everything about this pattern. It comes in different sizes including little girl sizes. There is the option to make it reversible and it is just plain cute! So I made a darling apron for  Maren and in the hustle and bustle of Christmas and trying to live in the moment, I of course forgot to take a picture before I wrapped it up and gave it away. I know Maren loves yellow and I picked out Heather Bailey's Hello Roses in Gold fabric for the main fabric. I love me some Heather Bailey.

And as I have been obsessing over aprons, my talented sister in law Abby came out with an apron pattern of her own!! It is an apron for Mommy and daughter. And can I just say it is DARLING! I am in love with the pockets and the sweetheart neckline and all of the ruffles. Cute, cute CUTE!


So by the end of this year I am hoping to have an apron for my almost 1 1/2 year old girl who keeps stealing her brother's and sister's aprons as well as a drawer full of cute aprons for myself. Because you can never have enough!

XO,
Maren

Monday, November 8, 2010

Orange Flower Girl Dress


My brother got married last month and he and his now wife wanted to have their three nieces in orange. My three year old and my new sister in law's three year old niece had matching dresses and my challenge was to make something that coordinated -without seeing in person the other two dresses. This is a picture of the dress online.  My best bet around here was to find something at JoAnn's which can be pretty limiting. I found the only fabric that I thought would fit the bill. It was close enough. In fact, one of my sister in laws had offered to make ties and bowties for all of the nephews and she used this exact same fabric. It is a costume satin. I am glad that it worked out for the wedding, but it does not hold up very well. I had to wash it after the wedding and the dress now has a lot of nice little snags in it. I used my favorite little girl dress pattern for this. Simplicity 2767. I bought matching tulle to put on the outside of the skirt to match the others but decided that I didn't like the way it looked with this dress and because I knew that there was a good chance that the tulle would get ripped to shreds. I was right on that account. After the wedding Bella's dress had a hole in her tulle and I will now have to trim it or cut it off completely if she wants to wear it again.


Because I don't really care for the flowers in the pattern I wanted to try something different on this dress. I have been wanting to make some burned edge flowers for a long long time and this seemed like the perfect chance. One of my cousins recently directed me to this wonderful tutorial so I used that for guidance. It was so fun I ended up making a bazillion of these. I made a few for hair accessories for the girls and one for myself and several others I had intended on sharing with any of the girls in the wedding party that were interested, but it turns out my new SIL has a very talented sister who made cute flowery hairbands for all the girls. So I now have a lot of these laying around my house. Some on brooch pins like this one. And some on hair clips, headbands and bobby pins.  I'm not sure what I am going to do with them so maybe they will end up as gifts. I found some pink and yellow satins in the remnant bin the other day so i am excited to make some in those colors as well.


XO
Maren

Trick or Treat Totes

 LeAnne's Trick or Treat Totes have been on my list for the last two years so I am happy to say that I finally made them this year.


While I was at JoAnn's before Halloween I noticed that all of their Halloween fabric was on sale (40% or 50%) so some of it was super cheap. I bought some Halloween fabric for the first time in my life with the intention of making these... and hopefully a few other fun Halloween things in the next year or two. The kids loved picking out their favorites of what I brought home. Buddy wanted the green bat fabric and Bella picked out the purple trick or treaters and my two favorite fabrics were the black/silver/sparkly spider web and candy fabric. So I put those together for the baby. I had fun cutting the shapes out of felt and doing a little embroider work. And I won't lie - sewing the spider onto the bag was a beast. It was worth it though because I love it and Bella decided it was her favorite. I think they are so cute though and the kids loved them. Even little Lou grabbed onto hers when we got in the car and didn't want to let go.


These cute Halloween totes made our Halloween even sweeter! Thanks LeAnne for the great tutorial!

XO
Maren
Fabric Hair Rollers

Here are the hair rollers I made using this tutorial. I made them a little differently because I thought my way of doing it was a bit easier. I will tell you what I did differently after I show you the pictures. I loved that I could use my fabric scraps for this project.

This is after she slept on them all night and are a little loose.


This is right after I took them out and sprayed them


From the front


I wish they made her hair curlier. I am not sure if her hair is just too long or what. There are some tips found here on how to use the rollers. I might try to find some of the same mousse that she uses to see if it makes a difference and wait for her hair to dry a little bit more. Also I think Wonder Woman Creations made her curlers a little bit smaller. If I ever do this again, I would like to make them smaller. I still think her hair turned out cute. I have actually used them on my hair and liked the way it turned out as well. It was soft and wavy.

For anyone interested, here is what I did differently from the tutorial mentioned above.

Once I had my piece cut out and folded in half longwise, I sewed all the way down the long end and across one short end instead of just sewing part way. I then flipped it right side out took my disappearing ink pen and marked 4" and stuffed it to that line and then sewed it on the line to seal in the stuffing. I kind of bunched it all up too as I was sewing across the line to get the gathered effect. Let's just call that lazy gathering.

I then ran all of my curlers through my serger to serge the raw ends. Yay for sergers! Alternatively, I would have folded in the the end and sewed it shut. Then I sewed on the button. To make the button end rounder I stuck my needle and thread into one corner and  then the other corner and pulled it tight bringing the corners in and making the end rounder. I then continued to sew the button to the center of that end.

To make the button hole (I actually like mine better horizontal) I folded my unstuffed end up towards the button and using my trusty disappearing ink pen I marked exactly where the button hole should go and because I used a lot of different sized buttons I made my mark the same length as the button so when I did my buttonhole on my sewing machine I knew exaclty where to start and stop. I hope that is understandable without pictures. Basically I just marked exactly where I needed my button hole to go and exactly how long it needed to be. Then I got my ol' seam ripper out and cut open my button hole. Tada! Pretty simple.

XO
Maren

Shirred Dress

This dress was made from the Zinna pattern from Kustom Kids Boutique which has now closed their doors. I like the dress but once again I am not a big fan of the fabrics I put together. I love the main fabric but I don't love how it looks with the blue here. Oh well. And I have to find some better elastic thread and redo some of the sewing on this dress because some of the elastic has already broken because I used some cheap-on-a-plastic-spool-kind of elastic thread. Don't make that mistake. If you are going to shirr, make sure you get the right kind of thread. See LeAnne's tutorial on shirring. She even has a great picture of the RIGHT kind of elastic thread. I also did another dress from the Kiera pattern also from Kustom Kids Boutique. It is basically the same thing except instead of a ruffle it has a contrasting band across the bottom and no tie. It turned out a lot cuter than this one, but I haven't taken a picture of it yet. I also have to redo some of the stitching on that one.  Shirring seiriously is ridiculously easy. You can pretty much make a dress like this in one afternoon. Check out LeAnne's Sweet Summer Dress Tutorial for a simple shirred dress, easy to change up however you like.


XO
Maren

Wooden Peg Dolls and House

I'm going to try to play some quick catch up. I made this in August for my daughters birthday and I posted it on my family blog, but I thought I would include it here as well. The house is a CD tower that was purchased at JoAnns as well as all of the wooden pieces that I used to make the furniture. I really would have liked to have done more with this, but I ran out of time. If I were to do another one of these I think I would use spray paint on some of the items to save on time and I would use paint pens for the smaller details. Overall a really fun project. Inspiration and some guidlines here and here.


XO
Maren

Tuesday, October 26, 2010

Tutorial: Strawberry Shortcake Hat


Although I have not found a lot of time lately to blog, I have still found some time to sew. Once I catch my breath I will catch you up on some of the stuff I have been sewing lately - including the hair rollers and some burned edge satin flowers.

I love Halloween. I do not, however, love the costumes found in the costume isles or in the Halloween stores for one reason or another (quality, $$$, etc). I especially don't love the costumes for little girls. But I won't go there today. I will just say that I think I will be making Halloween costumes for the rest of my life. And I will be happy to do it.

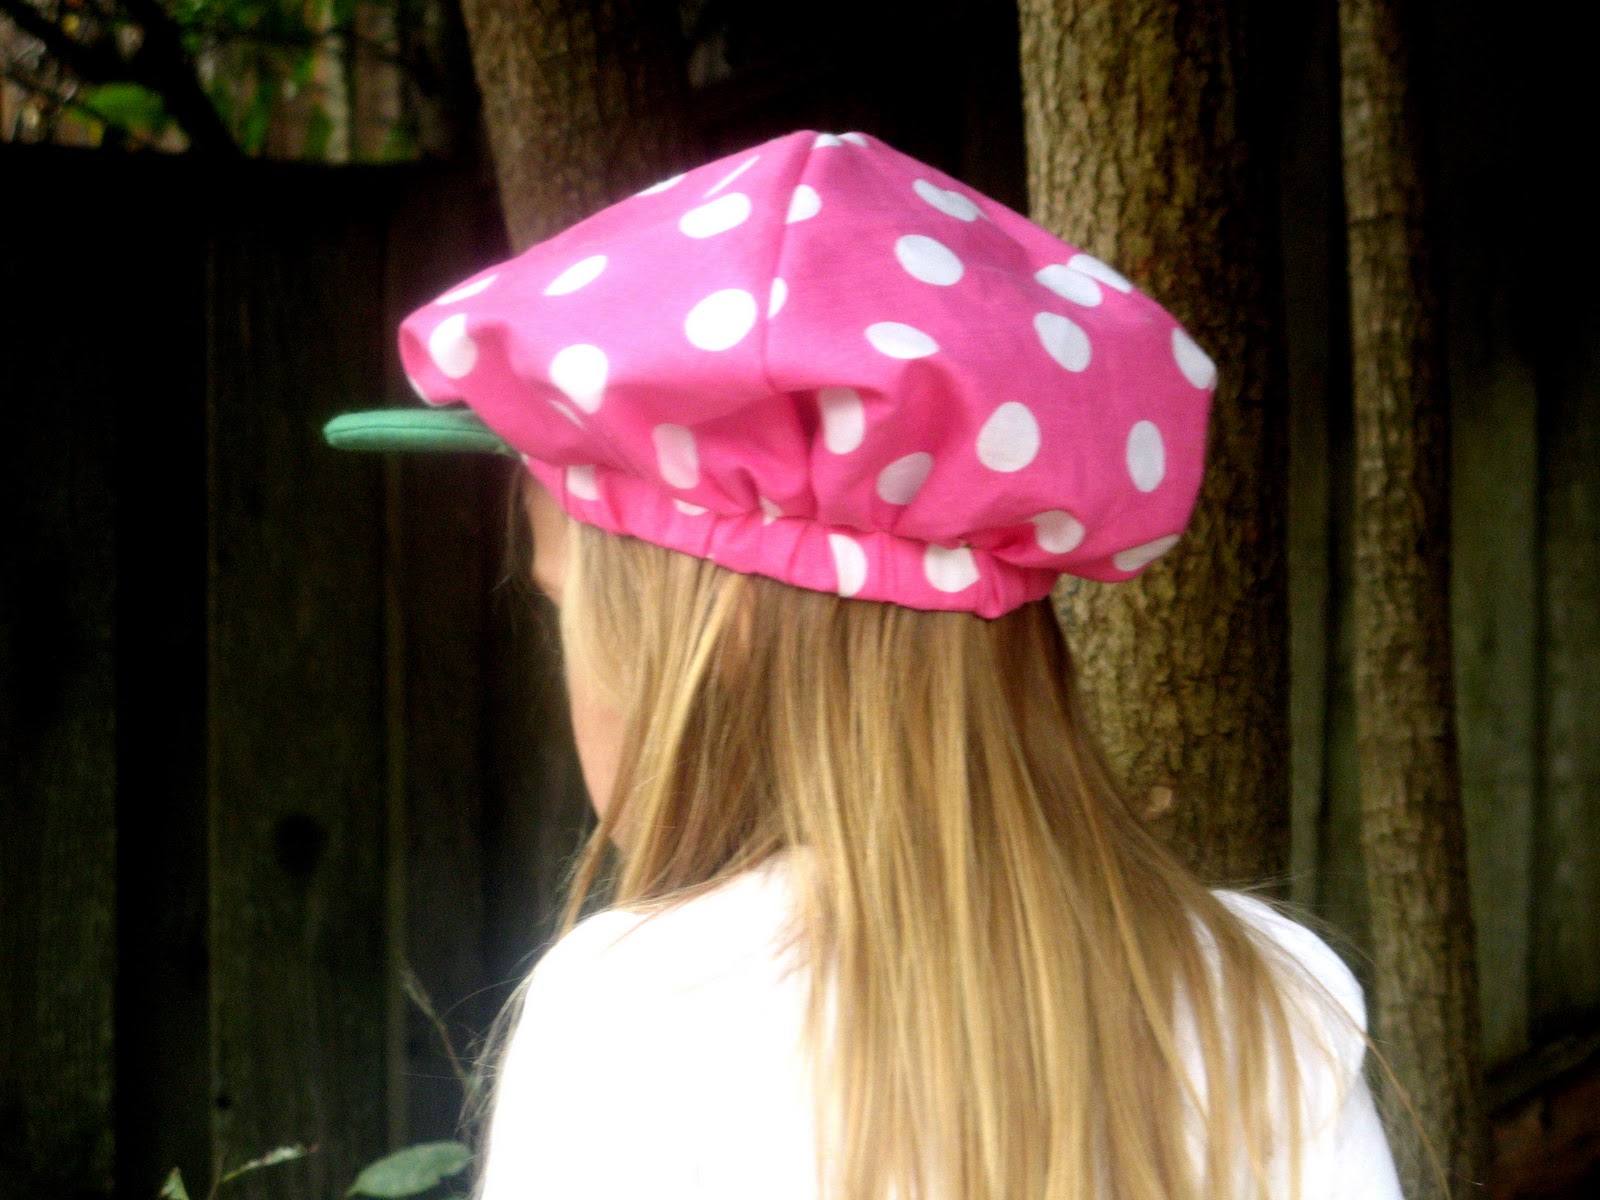
Bella finally decided, with a little persuasion from me, to be Strawberry Shortcake for Halloween. Her costume was pretty simple to throw together. I appliqued felt diamonds and a strawberry on a plain white t-shirt, bought some tights at one of those Halloween stores, and made a tutu. I admit that I think her costume would be a lot cuter with a simple elastic waistband skirt that matches the hat, but she loves tutus and I know her tutu years are limited. She loves it and feels magical in it so that is good enough for me. When she wears her costume for real I will probably curl her hair and paint a little strawberry on her cheek and maybe give her some freckles. I know there are pink strawberry shortcake wigs out there that you can buy for little girls, but I didn't want to spend the money on one or the time tracking one down. So basically the only thing I was perplexed on was her hat and I wasn't able to find any good tutorials out there for the right kind of hat. So here you go. It isn't the fanciest tutorial, but I hope you will get the picture.

This costume is based on the latest version of Strawberry Shortcake.

First: Make the brim

I got out my daughter's baseball hat and traced the shape of the brim onto a Costco milk box. I then cut it out and wrapped it in duct tape as suggested in this Threadbanger brimmed beanie tutorial.


I then traced around the brim on some wool felt. This is the same felt that I used to applique diamonds on her t-shirt. Make sure to leave enough room around the brim for a seam allowance - at least 1/2".


I actually only cut around the bottom and left the top flat.


Sew around outside edges and flip it right side out so that it looks like this.


Stuff your taped cardboard  brim inside and trace around the inside edge of the brim.


Sew along that line sealing the brim inside. Trim about 1/2" - 3/4" leaving enough material to sew to hat.


For the rest of the hat I took a one yard cut of pink fabric and cut it 10" deep. So I had a strip of fabric 36" x 10". I then cut three 6" slits dividing the strip into fourths. My fabric was folded into fourths already so I cut along the fold marks. Here is a good tutorial that I used for the method. I just had to find a way to make it bigger and floppier.


After you have your sections notched, create a football shape for each section. I folded each section in half and sketched something like this. Cut.


This is what it should look like when you are finished. I must have gotten a little lazy on the last one because it looks more like a triangle than a football.


Next sew adjacent sides together and do a basting stitch along the bottom edge. It should start looking kind of showercapish.


Next take a piece of wide elastic and measure it around your child's head. I happened to have some underwear elastic so that is what I used. Sew it into a circle.


Pin the hat to the elastic, gathering it evenly along the basting stitch as you do so. Sew the hat to the elastic. The other option would be to make a casing for the elastic. I just thought this was a lot easier.


Now, I had pictures for the rest of this process but my own dear Strawberry Shortcake got a hold of my camera and deleted them. Basically I took the elastic and flipped it towards the inside of the hat and sewed it in place. I then centered the brim and sewed it onto the hat above the elastic part so that the elastic part is not visible from the top. 

You are now finished (unless you want to embelish with a strawberry or green felt leaves on top)

Hopefully this picture will give you an idea of what it should look like.


Here is the whole costume. I have debated doing a strawberry purse, but I don't know if I will get to that - maybe when I convince my baby to be Strawberry Shortcake two years from now :)


(Please don't use pictures without permission)


XO
Maren


Friday, June 18, 2010

progress...

My quilt is taking much longer than expected... I now have it basted. pin basted.


XO
Maren

Baby Gifts: Applique Onsie and Baby Shoes

I made a couple of baby gifts for some gals having baby boys.  I used the stardust shoe pattern found here to make these fun shoes. I finally broke out my linen for the shoes- love it! I also made some applique onsies. The W stands for Wyatt. I haven't made the shirt yet to go with the blue shoes. Still waiting for that little one to be born.


XO
Maren

Thursday, June 17, 2010

Amy Butler Birdie Sling

I made another bag from Amy Butler's Birdie Sling pattern. I made one previously with some Dick and Jane fabric, but I wanted one that was a little more girly than kiddy so I made this one. I know the fabrics are a little crazy, but it was fun. I added the pink panel in the front because I couldn't decide if I wanted my bag to be pink or orange - so I did both :) I really like the way the panel changes the look of the bag.


XO
Maren

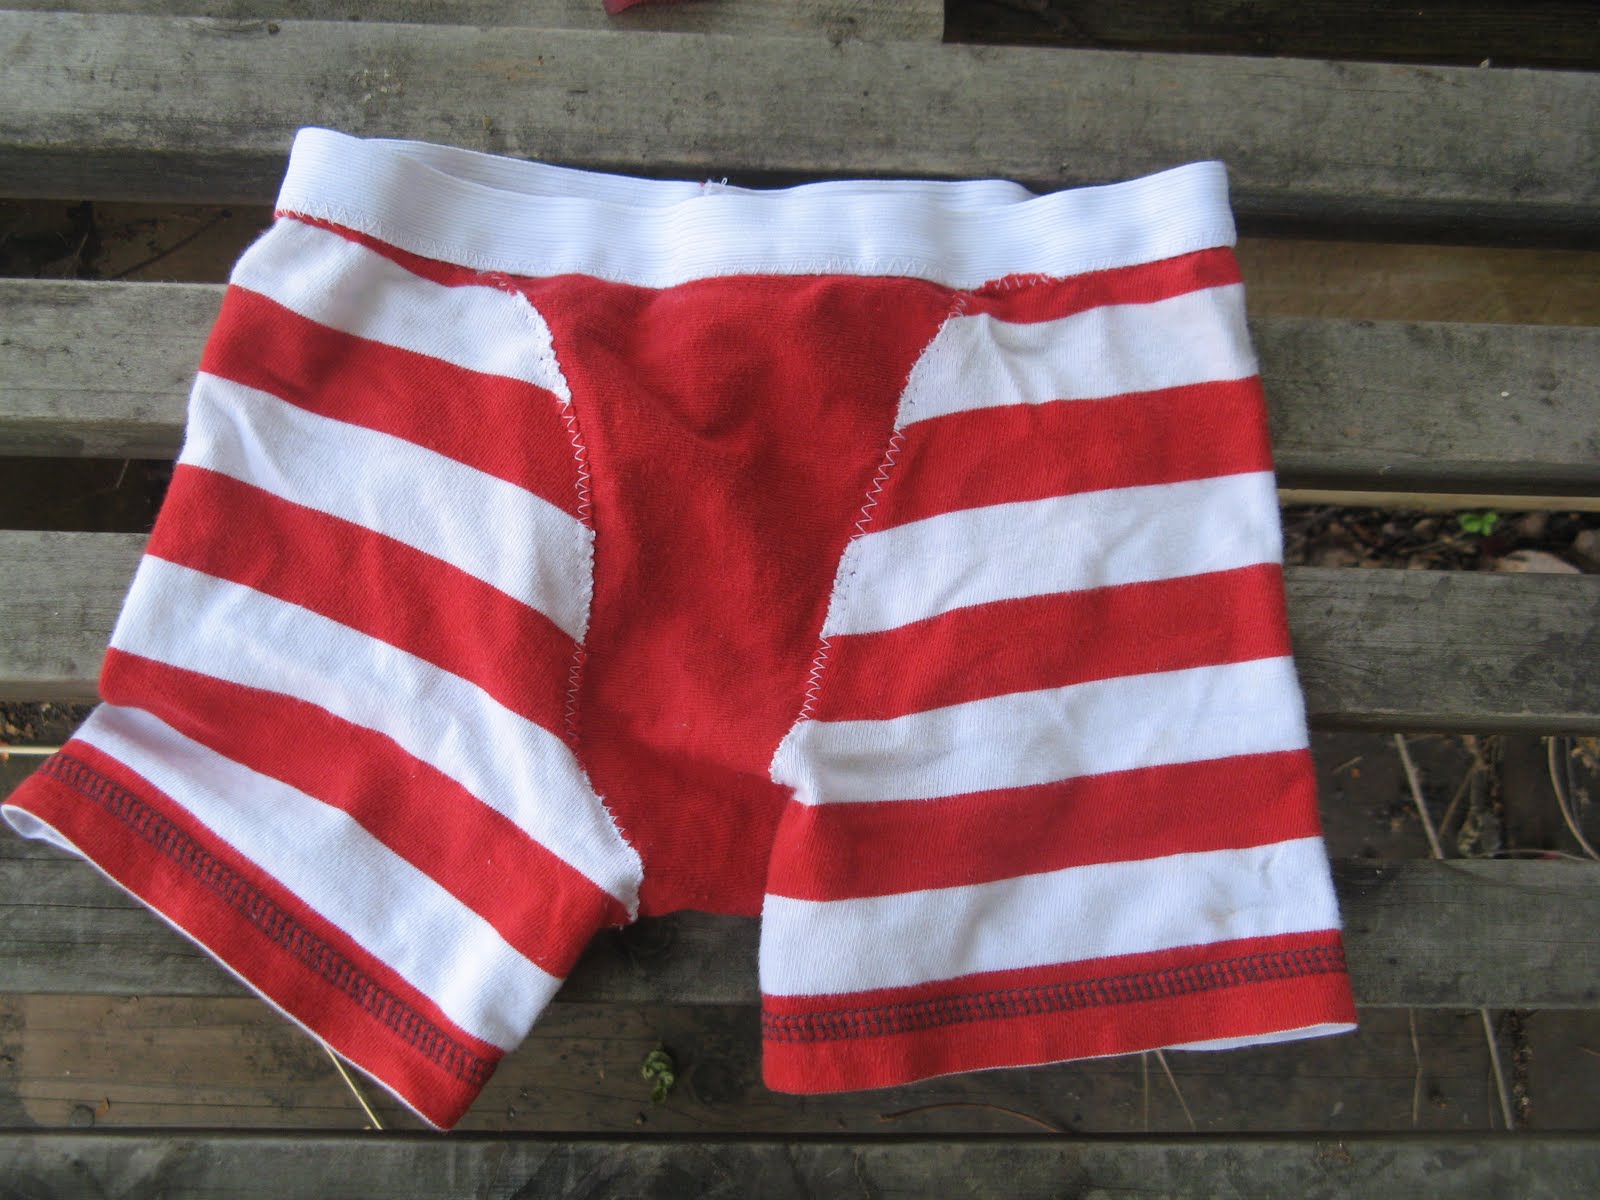
Refashion: boys boxers from t-shirt


I was so excited to try out this tutorial for T-Shirt Trunks and make some boxers for my little guy. I love the way they turned out. They look like pirate undies. ha ha ha....


XO
Maren


Refashion Skirt and Leg Warmers


The baby is crawling. When I realized that she could get up our step in the living room to our hard tile kitchen floor, I knew I wanted to get her some baby legs/leg warmers to protect her little knees. When I was at Target in the baby section I saw some baby legs for about $8. I remembered my SIL put together a tutorial to make some toddler leg warmers, so I wandered to the adult sock section. Sure enough their knee highs were on sale for $2. So I bought 4 pairs, came home and made legwarmers. Four pairs for the price of one. Yay! They fit both my 2 year old and my baby. On my baby I scrunch them up a little bit. I love them. I love being able to put my baby in a onsie in the summer but I can put these on when she is crawling around and I am going to love them in the fall and winter when I can put them on my preschooler with a skirt.


Speaking of which, after I made the leg warmers I decided I wanted some more cute skirts for my little girl. So I followed my SIL's tutorial for these skirts made out of old t-shirts. I LOVE them. I have been stockpiling old t-shirts for projects like this.  I used three different t-shirts to make these. The second one was made out of a man's t-shirt (large I think) so it is extra full even though I took it in a little bit.


As a side note, I love Abby's tip on making ruffles super easy. Set your tension to the highest setting and use a basting stitch. And to make mine even more fluffy I pulled the thread at the top of my machine while I was sewing pulling the stitch even tighter.

XO
Maren

Monday, May 10, 2010

Framed Silhouettes

For Mother's day I was planning on making some lip balm, but I got my order in too late and didn't get everything I needed so I decided on framed silhouettes instead. I will by using lip balm as lots of last minute gifts (birthdays (for little girls and women!), VT, Valentines etc etc)These silhouettes are something that I have wanted to do for a long time. I have been looking and looking for second hand oval frames for some time and just on Saturday I found  a nice big one so I can start working on one of these for my house. I based these smaller versions on this one. I put it behind the glass instead of on top because I didn't get time to go to the craft store to get the sticky dot things. My MIL loved hers so I will pronounce it a success. I gave her the green one since she has a lot of that green in her house. I did the other one based soley on what I really really loved and would love to have somewhere in my house, so if I can indeed give it up, I hope the owner (keeping it a secret for now) will love it just as much as I do.


Sorry,there is a little reflection on the glass!

You can probably find tutorials out there for a fairly easy way to do these silhouettes. I have a feeling I did mine the long way (although I still was able to do it in one relatively short sitting). I did mine in Adobe Photoshop (I think it is CS2 or somethine like that) and since I am not terribly well versed in it, the tutorials I found in my short looking weren't in depth enough for me so I basically used a black and white paintbrush to paint over pictures that I had taken of my children's profiles. Once I had done that and cropped it nice and close to the face, I copied them into a word document and sized them down to fit in this frame. I am going to have to figure out how to do this on a much larger scale since I want all three in a large frame (bigger than printer or scrapbook paper). Anyways! Hope you all had a wonderful Mother's Day!!

XO
Maren

Tuesday, May 4, 2010

Homemade Laundry Detergent

Is this on anyone's list? I have wanted to do this for a long time and I finally did it today. About a month or so ago we went for a shopping trip in the Sacramento area where we stopped at a Winco and stocked up on food supplies. I was excited to find everything I needed to make my own laundry detergent there. We normally buy a big thing of powder detergent at Costco and since I was running low on it Today I figured it was a good time to whip this up. I followed my SIL's tutorial found here. Here is the recipe:

1 bar of Fels-Naptha laundry soap (grated, then food-processed)
1 Cup Borax
1 Cup Washing Soda
1/4 C Baking Soda

After grating the bar soap (the kids called it soap cheese) I pulled out my trusty Magic Bullet to get it as fine as I could then I mixed it all  together in my big Costco laundry detergent bucket. I also wrote the recipe on the lid so I can find it easily the next time I make it and I also wrote down how much to use 2 TB/load.

I filled my bucket about quarter of the way (which was about 4x the recipe) and I think it will last at least twice as long as my big costco bucket and probably longer. I had originally bought 4 bars of soap 2 boxes of Borax and 2 boxes of Washing Soda. I ended up only using about half a box of the Borax and Washing Soda. So really this is WAY cheaper than buying laundry soap.

The "cheese soap" (pre-food-processed)


The kids loved helping with the whole process


Here is what it looks like all mixed together


Here is the bucket with the recipe written on it (also makes a nice drum)


Oh, and Buddy and Bella also insisted that I write on the bucket that it was made by us - so I wrote all of our names on it - just so we don't forget :)
XO
Maren