
I know I've already linked to a little fabric house, but I loved the "extras" on this!! So, so cute. So far in my Christmas crafting I've made 1/2 dozen fabric eggs, and a handful of strawberries. lol. I better get sewing! I just wish we had a joann's closer so I could just go pick up a lot of felt easily. The felt I'm using for the food is wool felt from a quilt shop. Quality and beautiful, but way too expensive to do a play house!
Felt Playhouse found at homemade by jill
A spin off of hers is also found at fireflies and jelly beans
Showing posts with label children. Show all posts
Showing posts with label children. Show all posts
Sunday, November 21, 2010

Tuesday, November 9, 2010
Celia's handcrafted Christmas link list
I just realize I TOTALLY dropped the ball on the challenges. Oops. My life kind of flipped upside down in Aug./Sept. and I'm just now kind of getting back into "recreational crafting". With Christmas around the corner, I have a few things I'd like to make, but we'll see what actually materializes.
I saw a really inexpensive wooden kitchenette at kid-to-kid when I was looking for Dean's birthday present. I haven't bought it, but I'm hoping it's still there. If it is, I want to make a load of felt food. If Jess or Mar have favorite tutorials (since I know you've made some) let me know. That link is to a picture board with links to tutorials. I would love to make: eggs (whole and fried), sandwich items, Chinese take out box and food, all veggies and fruits, stuff to make tacos and/or stirfry (I'm trying to figure out how I can do rice...I was thinking of just cutting the white felt into small rice size pieces. Messy though...), and maybe a few cookies or doughnuts. Not sure how long the process is, so I need to get started! If I can't find a cheap kitchen, I guess I could make one! Those are sooo beautiful, but I doubt I'd have time/energy.
Edit: Here's another link to some great felt food that I just found on Sew Mama Sew. It has a few things I didn't see on the other sites.
The felt fort-table cover at Make it and Love it that Lisa linked awhile back. I kind of want to make it fit my kitchen table so they have a larger play area, but that's a lot of felt! I think they'd love it.
Mini car mats by Serving Pink Lemonade. I think the car mat could be cute in a quiet book. I'd love to do other quiet book things as well. She also has a very cute mini take-along toy barn, though I doubt that will make the cut this Christmas for me.
I have stuff for Walt's car quilt to match Dean's. The back fabric has a brown base, and the outer edges are a bright blue. I would love to do that, but it may be too big of a project between now and then if I want to do anything else.
I saw a really inexpensive wooden kitchenette at kid-to-kid when I was looking for Dean's birthday present. I haven't bought it, but I'm hoping it's still there. If it is, I want to make a load of felt food. If Jess or Mar have favorite tutorials (since I know you've made some) let me know. That link is to a picture board with links to tutorials. I would love to make: eggs (whole and fried), sandwich items, Chinese take out box and food, all veggies and fruits, stuff to make tacos and/or stirfry (I'm trying to figure out how I can do rice...I was thinking of just cutting the white felt into small rice size pieces. Messy though...), and maybe a few cookies or doughnuts. Not sure how long the process is, so I need to get started! If I can't find a cheap kitchen, I guess I could make one! Those are sooo beautiful, but I doubt I'd have time/energy.
Edit: Here's another link to some great felt food that I just found on Sew Mama Sew. It has a few things I didn't see on the other sites.
The felt fort-table cover at Make it and Love it that Lisa linked awhile back. I kind of want to make it fit my kitchen table so they have a larger play area, but that's a lot of felt! I think they'd love it.
Mini car mats by Serving Pink Lemonade. I think the car mat could be cute in a quiet book. I'd love to do other quiet book things as well. She also has a very cute mini take-along toy barn, though I doubt that will make the cut this Christmas for me.
I have stuff for Walt's car quilt to match Dean's. The back fabric has a brown base, and the outer edges are a bright blue. I would love to do that, but it may be too big of a project between now and then if I want to do anything else.
Halloween totes
 I had every intention of making LeAnne's tote that Maren made, but the night before Halloween I found that I hadn't started or gathered materials, and I was babysitting for a friend all night. About 10 min. before I headed out the door, I grabbed a few fatquarters I thought might work, some batting, and my sewing machine. I thought I'd have internet access while there, but their computer was turned off. So, instead of making LeAnne's, I decided to make/modify a little basket I made a couple years ago that I kind of remembered. I had a piece of the brown pleather stuff I used last time for the bottom already cut the right size, so I made the two other pieces the same size as the bottom and cut the batting and lining to fit it once the three outer pieces were sewn together.
I'll tell you what I modified on her pattern: all 3 outer pieces were 6 in. X 9.5 in. and the batting and lining were modified to fit that once they were sewn together. The sewing process is essentially the same basket as pink penguin's scrap basket but with slightly taller and solid sides (so you don't have to worry about the patchwork steps), so please, check her basket and tutorial out!
Each basket took me less than an hour I think...
Here it is in action. Absolutely the perfect size for a 3 year old trick-or- treater. I think the size would also work very nicely as a scripture tote for a mini quad.

Monday, November 8, 2010
Orange Flower Girl Dress

My brother got married last month and he and his now wife wanted to have their three nieces in orange. My three year old and my new sister in law's three year old niece had matching dresses and my challenge was to make something that coordinated -without seeing in person the other two dresses. This is a picture of the dress online. My best bet around here was to find something at JoAnn's which can be pretty limiting. I found the only fabric that I thought would fit the bill. It was close enough. In fact, one of my sister in laws had offered to make ties and bowties for all of the nephews and she used this exact same fabric. It is a costume satin. I am glad that it worked out for the wedding, but it does not hold up very well. I had to wash it after the wedding and the dress now has a lot of nice little snags in it. I used my favorite little girl dress pattern for this. Simplicity 2767. I bought matching tulle to put on the outside of the skirt to match the others but decided that I didn't like the way it looked with this dress and because I knew that there was a good chance that the tulle would get ripped to shreds. I was right on that account. After the wedding Bella's dress had a hole in her tulle and I will now have to trim it or cut it off completely if she wants to wear it again.

Because I don't really care for the flowers in the pattern I wanted to try something different on this dress. I have been wanting to make some burned edge flowers for a long long time and this seemed like the perfect chance. One of my cousins recently directed me to this wonderful tutorial so I used that for guidance. It was so fun I ended up making a bazillion of these. I made a few for hair accessories for the girls and one for myself and several others I had intended on sharing with any of the girls in the wedding party that were interested, but it turns out my new SIL has a very talented sister who made cute flowery hairbands for all the girls. So I now have a lot of these laying around my house. Some on brooch pins like this one. And some on hair clips, headbands and bobby pins. I'm not sure what I am going to do with them so maybe they will end up as gifts. I found some pink and yellow satins in the remnant bin the other day so i am excited to make some in those colors as well.

XO
Maren
Trick or Treat Totes
LeAnne's Trick or Treat Totes have been on my list for the last two years so I am happy to say that I finally made them this year.

While I was at JoAnn's before Halloween I noticed that all of their Halloween fabric was on sale (40% or 50%) so some of it was super cheap. I bought some Halloween fabric for the first time in my life with the intention of making these... and hopefully a few other fun Halloween things in the next year or two. The kids loved picking out their favorites of what I brought home. Buddy wanted the green bat fabric and Bella picked out the purple trick or treaters and my two favorite fabrics were the black/silver/sparkly spider web and candy fabric. So I put those together for the baby. I had fun cutting the shapes out of felt and doing a little embroider work. And I won't lie - sewing the spider onto the bag was a beast. It was worth it though because I love it and Bella decided it was her favorite. I think they are so cute though and the kids loved them. Even little Lou grabbed onto hers when we got in the car and didn't want to let go.

These cute Halloween totes made our Halloween even sweeter! Thanks LeAnne for the great tutorial!
XO
Maren
Fabric Hair Rollers
Here are the hair rollers I made using this tutorial. I made them a little differently because I thought my way of doing it was a bit easier. I will tell you what I did differently after I show you the pictures. I loved that I could use my fabric scraps for this project.
This is after she slept on them all night and are a little loose.

This is right after I took them out and sprayed them

From the front

For anyone interested, here is what I did differently from the tutorial mentioned above.
Once I had my piece cut out and folded in half longwise, I sewed all the way down the long end and across one short end instead of just sewing part way. I then flipped it right side out took my disappearing ink pen and marked 4" and stuffed it to that line and then sewed it on the line to seal in the stuffing. I kind of bunched it all up too as I was sewing across the line to get the gathered effect. Let's just call that lazy gathering.
I then ran all of my curlers through my serger to serge the raw ends. Yay for sergers! Alternatively, I would have folded in the the end and sewed it shut. Then I sewed on the button. To make the button end rounder I stuck my needle and thread into one corner and then the other corner and pulled it tight bringing the corners in and making the end rounder. I then continued to sew the button to the center of that end.
To make the button hole (I actually like mine better horizontal) I folded my unstuffed end up towards the button and using my trusty disappearing ink pen I marked exactly where the button hole should go and because I used a lot of different sized buttons I made my mark the same length as the button so when I did my buttonhole on my sewing machine I knew exaclty where to start and stop. I hope that is understandable without pictures. Basically I just marked exactly where I needed my button hole to go and exactly how long it needed to be. Then I got my ol' seam ripper out and cut open my button hole. Tada! Pretty simple.
XO
Maren
Shirred Dress
This dress was made from the Zinna pattern from Kustom Kids Boutique which has now closed their doors. I like the dress but once again I am not a big fan of the fabrics I put together. I love the main fabric but I don't love how it looks with the blue here. Oh well. And I have to find some better elastic thread and redo some of the sewing on this dress because some of the elastic has already broken because I used some cheap-on-a-plastic-spool-kind of elastic thread. Don't make that mistake. If you are going to shirr, make sure you get the right kind of thread. See LeAnne's tutorial on shirring. She even has a great picture of the RIGHT kind of elastic thread. I also did another dress from the Kiera pattern also from Kustom Kids Boutique. It is basically the same thing except instead of a ruffle it has a contrasting band across the bottom and no tie. It turned out a lot cuter than this one, but I haven't taken a picture of it yet. I also have to redo some of the stitching on that one. Shirring seiriously is ridiculously easy. You can pretty much make a dress like this in one afternoon. Check out LeAnne's Sweet Summer Dress Tutorial for a simple shirred dress, easy to change up however you like.


XO
Maren
Tuesday, October 26, 2010
Tutorial: Strawberry Shortcake Hat

I love Halloween. I do not, however, love the costumes found in the costume isles or in the Halloween stores for one reason or another (quality, $$$, etc). I especially don't love the costumes for little girls. But I won't go there today. I will just say that I think I will be making Halloween costumes for the rest of my life. And I will be happy to do it.
Bella finally decided, with a little persuasion from me, to be Strawberry Shortcake for Halloween. Her costume was pretty simple to throw together. I appliqued felt diamonds and a strawberry on a plain white t-shirt, bought some tights at one of those Halloween stores, and made a tutu. I admit that I think her costume would be a lot cuter with a simple elastic waistband skirt that matches the hat, but she loves tutus and I know her tutu years are limited. She loves it and feels magical in it so that is good enough for me. When she wears her costume for real I will probably curl her hair and paint a little strawberry on her cheek and maybe give her some freckles. I know there are pink strawberry shortcake wigs out there that you can buy for little girls, but I didn't want to spend the money on one or the time tracking one down. So basically the only thing I was perplexed on was her hat and I wasn't able to find any good tutorials out there for the right kind of hat. So here you go. It isn't the fanciest tutorial, but I hope you will get the picture.
This costume is based on the latest version of Strawberry Shortcake.
First: Make the brim
I got out my daughter's baseball hat and traced the shape of the brim onto a Costco milk box. I then cut it out and wrapped it in duct tape as suggested in this Threadbanger brimmed beanie tutorial.

I then traced around the brim on some wool felt. This is the same felt that I used to applique diamonds on her t-shirt. Make sure to leave enough room around the brim for a seam allowance - at least 1/2".

I actually only cut around the bottom and left the top flat.

Sew around outside edges and flip it right side out so that it looks like this.

Stuff your taped cardboard brim inside and trace around the inside edge of the brim.

Sew along that line sealing the brim inside. Trim about 1/2" - 3/4" leaving enough material to sew to hat.

For the rest of the hat I took a one yard cut of pink fabric and cut it 10" deep. So I had a strip of fabric 36" x 10". I then cut three 6" slits dividing the strip into fourths. My fabric was folded into fourths already so I cut along the fold marks. Here is a good tutorial that I used for the method. I just had to find a way to make it bigger and floppier.

After you have your sections notched, create a football shape for each section. I folded each section in half and sketched something like this. Cut.

This is what it should look like when you are finished. I must have gotten a little lazy on the last one because it looks more like a triangle than a football.

Next sew adjacent sides together and do a basting stitch along the bottom edge. It should start looking kind of showercapish.

Next take a piece of wide elastic and measure it around your child's head. I happened to have some underwear elastic so that is what I used. Sew it into a circle.

Pin the hat to the elastic, gathering it evenly along the basting stitch as you do so. Sew the hat to the elastic. The other option would be to make a casing for the elastic. I just thought this was a lot easier.

Now, I had pictures for the rest of this process but my own dear Strawberry Shortcake got a hold of my camera and deleted them. Basically I took the elastic and flipped it towards the inside of the hat and sewed it in place. I then centered the brim and sewed it onto the hat above the elastic part so that the elastic part is not visible from the top.
You are now finished (unless you want to embelish with a strawberry or green felt leaves on top)
Hopefully this picture will give you an idea of what it should look like.

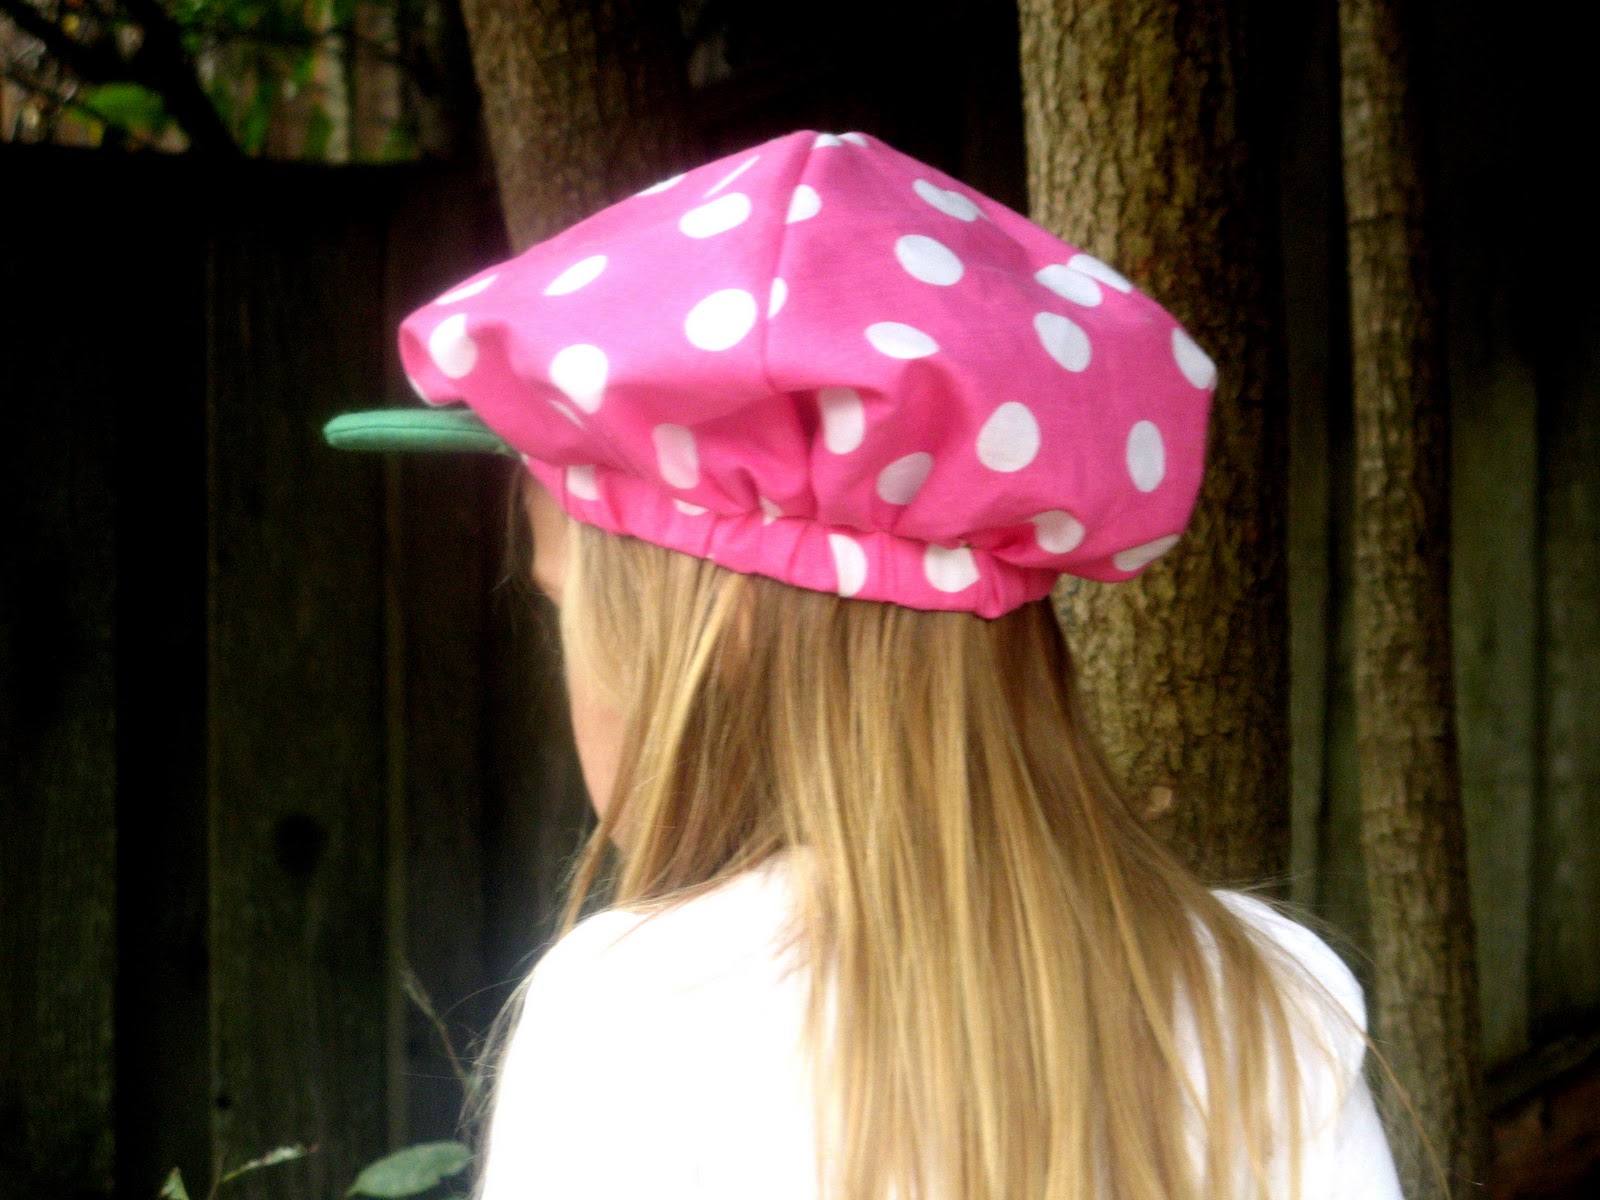
Here is the whole costume. I have debated doing a strawberry purse, but I don't know if I will get to that - maybe when I convince my baby to be Strawberry Shortcake two years from now :)

(Please don't use pictures without permission)
XO
Maren
Wednesday, September 1, 2010
September Challenge
Hi! It's Maren here and I am going to post our challenges for this month. I can't believe it is September already!!
I am so glad that Celia included LeAnne's Trick or Treat Tote in the challenge last month because that is on my list to do before Halloween. I was scrolling through some of her tutorials and remembered that she also had a cute felt Halloween banner which would be another fun Haloweeny thing to whip up for a decoration this Halloween season.
Since I have girls I am going to post a few links of some girly things that I have been working on or that I have been thinking about working on. They are great for either the little girls in your life or for yourself.
First: Fabric Hair Rollers from Life with Monkey. Have you ever tried those pink foam ones. Well check out this little girl's hair using rollers from this tutorial. WAAAY better results. I think I will be wearing these to bed.
Second: Shirring. I have been hit by the shirring bug. And I have LeAnne to thank for this! She did a tutorial for a cute little summer dress and tipped me off on some patterns that were for sale on etsy. I manged to snag a few patterns before the shop closed forever and I really have enjoyed them. I'll post more about them later. I think that LeAnne did a great job with her dress tutorial and the great thing about shirring is it is so easy and so cute and so versatile. You can add wide hems of coordinating fabric, ruffles, different types of sleeves. wider strips for cap sleeves, ribbons, spaghetti straps etc. You can even make a top for yourself as well!

LeAnne also did a great tutorial on shirring. I am so glad that she included a picture of what the elastic thread should look like. Months before I started shirring I picked up some elastic thread at JoAnns because I knew at some point I wanted to give it a try. My thread was on a plastic spool. I kept hearing that it has to be on a cardboard one. I went back to JoAnns to find the stuff that I needed and could NOT find it. I even asked someone and they were pretty clueless as to what I was even talking about. The label on the thread I got said it was meant for shirring so I used it. And it worked. However, The first day my daughter wore her dress I noticed that some of the thread broke and now I will have to go back and do it again! Not Fun. So I will be finding another way to get the proper elastic thread. Just a word to the wise.
Third: I have really been wanting to make my oldest daughter some cute flower hairclips/headbands to wear to preschool. I love these kinds of projects because they don't take a lot of time and you can make a whole bunch in one sitting. Here are a few tutorials. These flowers can be used for anything - brooch, clip for a purse or bag, gift topper etc. No sewing machine necessary! (sorry I was not able to get any of the pictures up - but go ahead and click. You won't be sorry)
Felt Peony
Felt Flower - the scalloped roll method
Felt Flower - the glue method (love the button center)
Satin Flowers - the candle method - I soooo want to do this one
Rolled Fabric Flower
Fabric and Paper flower roudup from Little birdie secrets -I love the painted newspaper flowers. It would be a fun one to do with kids to give away to someone special (Mother's day, Valentines day, birthdays etc)
Recipe: Triple Layer Carrot Cake with Cream Cheese Frosting
I love fall desserts and I love this one. I made this on a couple of different occasions. Once for my son's first birthday and now that I have an October birthday I think I am going to make it for my baby's first birthday next month. It is very yummy. I have done it with three layers, but it would also be yummy as cupcakes or made in a regular old cakepan. Delish!
I am so glad that Celia included LeAnne's Trick or Treat Tote in the challenge last month because that is on my list to do before Halloween. I was scrolling through some of her tutorials and remembered that she also had a cute felt Halloween banner which would be another fun Haloweeny thing to whip up for a decoration this Halloween season.
Since I have girls I am going to post a few links of some girly things that I have been working on or that I have been thinking about working on. They are great for either the little girls in your life or for yourself.
First: Fabric Hair Rollers from Life with Monkey. Have you ever tried those pink foam ones. Well check out this little girl's hair using rollers from this tutorial. WAAAY better results. I think I will be wearing these to bed.
Second: Shirring. I have been hit by the shirring bug. And I have LeAnne to thank for this! She did a tutorial for a cute little summer dress and tipped me off on some patterns that were for sale on etsy. I manged to snag a few patterns before the shop closed forever and I really have enjoyed them. I'll post more about them later. I think that LeAnne did a great job with her dress tutorial and the great thing about shirring is it is so easy and so cute and so versatile. You can add wide hems of coordinating fabric, ruffles, different types of sleeves. wider strips for cap sleeves, ribbons, spaghetti straps etc. You can even make a top for yourself as well!

LeAnne also did a great tutorial on shirring. I am so glad that she included a picture of what the elastic thread should look like. Months before I started shirring I picked up some elastic thread at JoAnns because I knew at some point I wanted to give it a try. My thread was on a plastic spool. I kept hearing that it has to be on a cardboard one. I went back to JoAnns to find the stuff that I needed and could NOT find it. I even asked someone and they were pretty clueless as to what I was even talking about. The label on the thread I got said it was meant for shirring so I used it. And it worked. However, The first day my daughter wore her dress I noticed that some of the thread broke and now I will have to go back and do it again! Not Fun. So I will be finding another way to get the proper elastic thread. Just a word to the wise.
Third: I have really been wanting to make my oldest daughter some cute flower hairclips/headbands to wear to preschool. I love these kinds of projects because they don't take a lot of time and you can make a whole bunch in one sitting. Here are a few tutorials. These flowers can be used for anything - brooch, clip for a purse or bag, gift topper etc. No sewing machine necessary! (sorry I was not able to get any of the pictures up - but go ahead and click. You won't be sorry)
Felt Peony
Felt Flower - the scalloped roll method
Felt Flower - the glue method (love the button center)
Satin Flowers - the candle method - I soooo want to do this one
Rolled Fabric Flower
Fabric and Paper flower roudup from Little birdie secrets -I love the painted newspaper flowers. It would be a fun one to do with kids to give away to someone special (Mother's day, Valentines day, birthdays etc)
Recipe: Triple Layer Carrot Cake with Cream Cheese Frosting
I love fall desserts and I love this one. I made this on a couple of different occasions. Once for my son's first birthday and now that I have an October birthday I think I am going to make it for my baby's first birthday next month. It is very yummy. I have done it with three layers, but it would also be yummy as cupcakes or made in a regular old cakepan. Delish!
XO
Maren
Friday, June 18, 2010
progress...
My quilt is taking much longer than expected... I now have it basted. pin basted.

XO
Maren
Baby Gifts: Applique Onsie and Baby Shoes
I made a couple of baby gifts for some gals having baby boys. I used the stardust shoe pattern found here to make these fun shoes. I finally broke out my linen for the shoes- love it! I also made some applique onsies. The W stands for Wyatt. I haven't made the shirt yet to go with the blue shoes. Still waiting for that little one to be born.


XO
Maren
Thursday, June 17, 2010
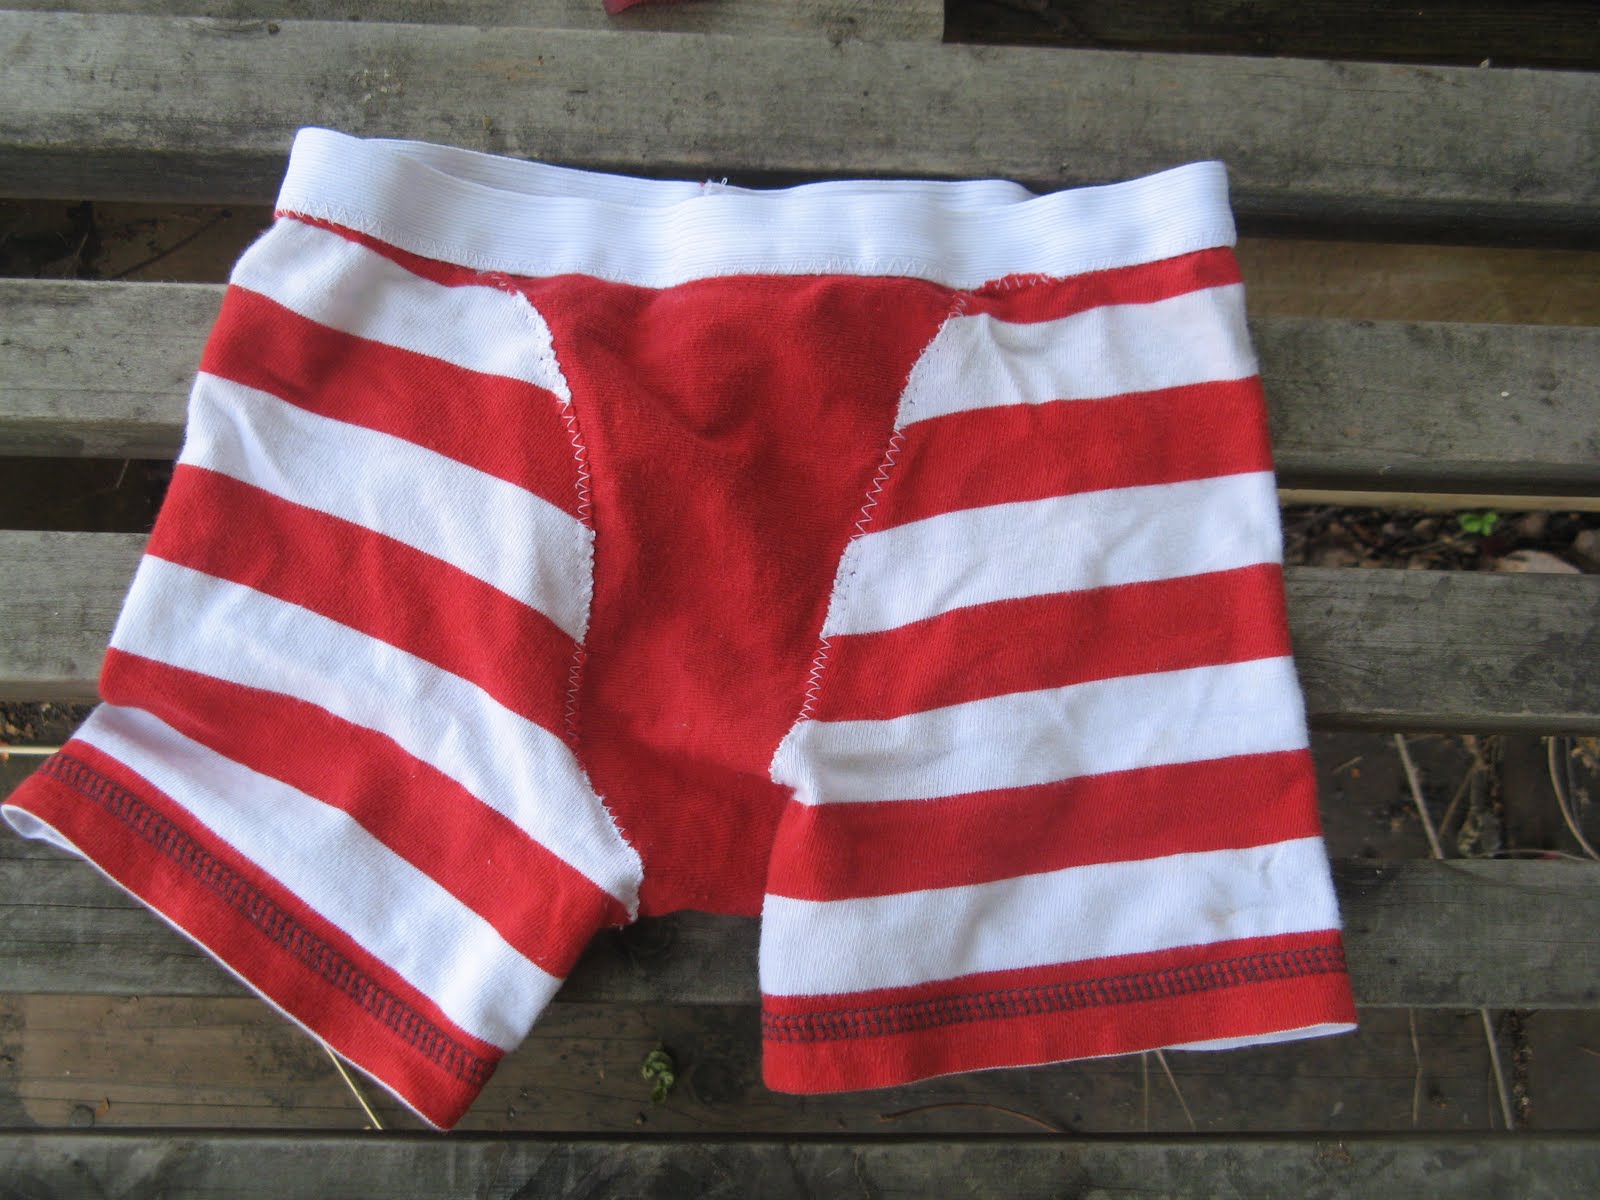
Refashion: boys boxers from t-shirt
I was so excited to try out this tutorial for T-Shirt Trunks and make some boxers for my little guy. I love the way they turned out. They look like pirate undies. ha ha ha....

XO
Maren
Refashion Skirt and Leg Warmers

The baby is crawling. When I realized that she could get up our step in the living room to our hard tile kitchen floor, I knew I wanted to get her some baby legs/leg warmers to protect her little knees. When I was at Target in the baby section I saw some baby legs for about $8. I remembered my SIL put together a tutorial to make some toddler leg warmers, so I wandered to the adult sock section. Sure enough their knee highs were on sale for $2. So I bought 4 pairs, came home and made legwarmers. Four pairs for the price of one. Yay! They fit both my 2 year old and my baby. On my baby I scrunch them up a little bit. I love them. I love being able to put my baby in a onsie in the summer but I can put these on when she is crawling around and I am going to love them in the fall and winter when I can put them on my preschooler with a skirt.

Speaking of which, after I made the leg warmers I decided I wanted some more cute skirts for my little girl. So I followed my SIL's tutorial for these skirts made out of old t-shirts. I LOVE them. I have been stockpiling old t-shirts for projects like this. I used three different t-shirts to make these. The second one was made out of a man's t-shirt (large I think) so it is extra full even though I took it in a little bit.


As a side note, I love Abby's tip on making ruffles super easy. Set your tension to the highest setting and use a basting stitch. And to make mine even more fluffy I pulled the thread at the top of my machine while I was sewing pulling the stitch even tighter.
XO
Maren
Monday, May 3, 2010
Crochet Beanies
This is the crochet beanie I made for our YM/YW auction. It fit on Bella's head as well as mine. I love beanies that I can share with my little girl. I also like the colors of this one. I don't know why, but I really love the color grey. I think it turned out nicely.

In trying to come up with ideas for a beanie I found some really cute free patterns. I stumbled across this wonderful blog with tons of cute hat patterns. I started with the Jayde hat. But before that - I went to the yarn store where the lady there suggested I use a sport weight nylon yarn which is thinner than the worsted weight. I took her advice (I think she is a knitter herself) and wish I hadn't. Most crochet patterns still call for the worsted weight. So against my better judgment I tried the pattern with the sport wieght yarn and a smaller hook and ended up with a hat that fit my 6 month old. I knew it would be smaller, just didn't know how much. So Lou now has a new hat. It's pretty cute, but it almost looks like I messed up a bit. It is stretching a little above the mini brim. It's fun though - a little slouchy with a little brim. I wanted to add a fabric flower but haven't made up my mind yet.

Anyways, after that I went with my standby and made the hat at the top, but used a different flower pattern than I have done in the past. After the auction as I was cleaning up and organizing my yarn I decided to whip up this other cute pattern that I wanted to try. Here it is. I added another row of increases so I could wear it as well as Bella. It fits us both, but I think it looks better on her. I used two more of my favorite vintage buttons.


May the force be with you!
Here it is on me
(I would probably add still another row to make it fit an adult better)

Other patterns I want to try are Valeries Butterfly Hat and her army style hat. It is safe to say that I have been hit with the crochet bug again. I just signed up on Ravelry's free website and there are lots of cool projects on there. I ordered some yarn for an afghan for Bella and I can't wait to get started on that.
XO
Maren
Felt Hair Clips
I signed up to make a donation for our Young Men and Young Women acution for their scout camp and various activities. Last year I made some felt hair clips so I decided to do the same thing this year. I also made a crochet beanie which I will show you later. Here are the clips.

I used this tutorial for the rose clips. At first I didn't realize I was supposed to cut down the lines on the larger petal so my first attempts (the red rose) were a little sloppy. I finally figured it out on the pink one. I love the template for the clip covering in this pattern too. The clips stay right inside. I used to glue the little felt "sleeping bags" to my clips but since my glue gun is junk and since Bella isn't exaclty easy on her things the clips kept falling out. No falling out with these ones. My favorite clip is the layered circle rose with the clear vintage button as well as the clip with one of my all time favorite vintage poppy buttons on it. I made a few duplicates for Bella! These are my favorite hair accessories because quite often I am in a hurry to do Bella's hair and this is the easiest thing for me to do. I just pop one of these in her hair to keep her hair out of her face. Also, one of my favorite projects because it is so fun and they work up pretty quickly (and I love working with felt :)
XO
Maren

I used this tutorial for the rose clips. At first I didn't realize I was supposed to cut down the lines on the larger petal so my first attempts (the red rose) were a little sloppy. I finally figured it out on the pink one. I love the template for the clip covering in this pattern too. The clips stay right inside. I used to glue the little felt "sleeping bags" to my clips but since my glue gun is junk and since Bella isn't exaclty easy on her things the clips kept falling out. No falling out with these ones. My favorite clip is the layered circle rose with the clear vintage button as well as the clip with one of my all time favorite vintage poppy buttons on it. I made a few duplicates for Bella! These are my favorite hair accessories because quite often I am in a hurry to do Bella's hair and this is the easiest thing for me to do. I just pop one of these in her hair to keep her hair out of her face. Also, one of my favorite projects because it is so fun and they work up pretty quickly (and I love working with felt :)
XO
Maren
Refashion: Maternity Top to Girl's Dress

Here is another quick refashion I did for Bella. I took a maternity shirt that I had and took it in to fit her. It already had straps so I just took them off, shortened them and repositioned them with a criss cross on the back. I don't like this quite as much as the other one I made for her since it isn't as full. Bella likes it though, so I am happy.
Here is the before. If you look close you can see the saftey pin at the top where I have it pinned together to mark the new seam.

Here is the back with criss cross straps. I ended up having two seams since I used more than half the shirt so I centered the two seams on the back.

XO
Maren
Friday, April 30, 2010
Almost made it!

I really wanted to have this completely finished by tonight, but the binding just wasn't happening for me. But I am proud of what I have accomplished so far. I was inspired by the figgy pudding quilt in design, but I wanted it a different size, so I just kind of made it up as I went along. This was definitely on the edge of my sewing capability! I used the basting technique from crazy mom quilts (she's blogging again! yippee!) did the straight line quilting from tallgrass prairie studio. The material is Riley Blake's Wheels collection and I bought it from The Dizzy Daizy. She shipped it super fast and it was all in perfect order.
After buying some totally over priced thread at my quilt shop, I looked online and bought way more of the same type of thread for way less at ConnectingThread. I took the other stuff back. I'm happy with the thread. It's even cheaper than the Coats and Clark you'd buy at Walmart if you buy in bulk (to offset shipping).
I thought that I would do the cross quilting, but I tell you what, I'm pleased with how it looks right now, and I don't want to spend any more time sewing straight lines! It wasn't hard, but it was way more time consuming than I expected. This quilt also took more fabric than I expected. (4 yards of the green, 2 yards of the blue cars, and 1/2 yard of the roadway, and less than 1/8 yard of the others.)
I used a 80/20 cotton heirloom batting from Hobby Lobby. I like the feel of it and it was easy to quilt. I bought a queen size and I'll be able to use it for both quilts (I'm making one very similar but with brown car backing for Walter. Eventually.).
The final size is 49 X 78. Larger than toddler size (~45X60), smaller than a twin comforter(~65X88). I'm hoping he'll be able to use it on a twin bed eventually, though.


Subscribe to:
Posts (Atom)
